Friday, January 29, 2010

Make Your Own Edible Sugar Gems - Tutorial and Resources

All of my supplies were purchased at Country Kitchen SweetArt


These are the instructions I used from the book Cooked Sugar Art by Vi Whittington.
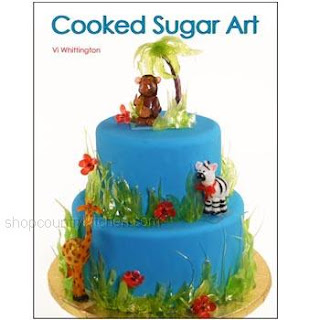

If you do not order the book, you will still receive instructions when you order the molds.

Isomalt recipe from Cooked Sugar Art

2 cups isomalt
1/2 cup distilled water, or water from the tap; distilled water has
fewer impurities
Distilled water or water from the tap for brushing down crystals
Food coloring, optional
1/2 teaspoon flavor, concentrated or oil, optional
Tools:
Candy thermometer
Heavy saucepan with lid
Whisk
2” brush
Small strainer
Large pan with ice water (base of saucepan should fit inside)
Microwave-safe bowls (A silicone muffin pan with the cups cut apart works well for containers as well as silicone cupcake holders.)
Locking bags for storing, or a sealing machine, if not all sugar is used
Instructions:
Best to work in a cool room with low humidity. In a heavy saucepan, whisk water into isomalt. Heat on medium low and stop stirring for the rest of the process. When mixture becomes clear, skim off foam with strainer. Dip a clean brush into water and gently brush the inside perimeter of the saucepan with wet brush, slightly above the boiling sugar. Continue skimming the foam and washing down the sides of the saucepan until the syrup is completely clear. The impurities are not harmful for consumption, but by removing the foam, the resulting syrup will have more clarity and strength. When crystals are washed from the side and syrup appears clear, place thermometer in pan, and cook to 250 degrees. Add food coloring if desired. Continue cooking on medium heat to 340 degrees. Immediately remove pan from stove and plunge into cold water for a few seconds to stop the cooking. Gently stir in flavor. Cover for two minutes to be sure the flavor is infused into the syrup. The resulting syrup is ready to pour into molds, or poured into puddles on parchment paper or a silicone mat to cool. Store the puddles in locking bags, storing flat without pieces in each bag touching each other. Better yet, vacuum seal the pieces in bags. Place bags in airtight containers with silica gel. If wanting to cast (mold) the hardened pieces of isomalt, place isomalt in a microwave-safe container and microwave at 5 second intervals until a liquid state. The resulting syrup is ready to mold into jewels (follow instructions above for casting jewels).


Basic Casting Instructions for Isomalt or Venuance Pearls
Ingredients:
Syrup recipe (see below)
Cooking spray
Tools:
Jewel molds
Funnel with stopper for large jewel cavities
Large silicone spatula
Baking sheets
Large measuring cup-for large jewel cavities
Toothpicks or sucker sticks
Silicone mat or parchment paper
Silicone cupcake holder
Instructions:
With cooking spray, coat hard candy jewel molds and a funnel with a stopper if using a mold with large jewel cavities. Wipe out excess cooking spray with a paper towel. Set sprayed molds on a baking sheet or a surface that withstands heat. For small cavities, use a toothpick or sucker stick to fill. If using a funnel, set the funnel with the stopper covering the hole, in a large measuring cup or any container which will hold the funnel level. Pour the hot syrup into the funnel. Fill each cavity by lifting the stopper just enough to allow the syrup to fill each mold cavity, then quickly cover the opening in the funnel with the stopper to stop the sugar flow. When jewels cool, invert each mold, letting jewels fall from mold onto parchment paper or a silicone mat which is on a soft surface such as a folded towel.
_____

What I did is make the Isomalt and then pour it into little puddles on my silicone mat. I left it clear. Then I would take a small ramekin or mug and microwave a few at a time to melt them. Then I'd flavor and color that mini batch. You need to do this near a microwave because I found I was warming my batch in 15 second intervals every 5-10 minutes while casting the jewels. A coffee cup warmer would probably help a lot!

Then you can pour about 3 tsp at a time into a little medicine cup or silicone muffin cup (suggestion above) and fill the cavities in your mold. If you bang the medicine cup on the table a few times before you pour, you'll eliminate a lot of bubbles. It's definitely trial and error. The biggest things I learned are to work in small batches, keep it hot, and WATCH OUT FOR BURNS! I've got blisters on both hands!

Isomalt shouldn't cloud but if it does or you want more shine, spray it with cooking spray and they'll perk right up.

Country Kitchen also sells silica gel packs. Get some when you order your supplies and put them in with your stored gems in an airtight container. That will help maintain low moisture to prevent sticking.

Photobucket

Thursday, January 28, 2010

Today's Lesson: Watch out for HOT sugar!

Today was most definitely a day full of sparkle. I'm thrilled with the results and even more excited about how easy it is to make edible sugar gems once you get enough practice. On the down side, I've got 4 burns and two blisters.


I keep hearing in my head the things people would tell me when I'd say I want to learn sugar work... Specifically, all the warnings about sugar burns. The silly things we do when we are determined.


Leaving the dripping cup (I used small mugs and ramekins) too close to your hand is a BAD idea. I'd bump it with my finger, burning hot sugar would promptly adhere and BURN BURN BURN! One lesson learned, don't pick off the hot sugar with your other hand! Grab a towel! Second lesson learned, keep the cup a safe distance from your hands. Third lesson learned, use little plastic medicine cups to fill the molds.

Now my mind is racing with ideas for the applications of all these beauties now that I don't have to pay $7.50 plus shipping for 10 little gems.


Happy Baking!

Photobucket

Wednesday, January 27, 2010

Bring a little BLING to the party!

It's been such a whirlwind preparing all the elements for the Couture Cake Creator Parties, but I've been loving every moment of it. Everything is so girlie and fun. One thing we want to offer are jewels that the kids can use to make their little mini party cakes. After pricing them online, I quickly realized that the jewels would need to be manufactured by "yours truly" rather than purchased.

My shipment of supplies arrived today and being all impatient and excited, I had to get to work. Here's my first batch of pink gems. I plan to make clear and lavender as well.


I purchased all of my supplies from Country Kitchen Sweet Art.

I went with Isomalt rather than sugar after doing research on both. Isomalt makes a clearer gem and isn't as susceptible to humidity. It wasn't as hard as I thought but I did learn that if you can keep it good and hot while working with it, it's a lot easier. Soon as it cools just a bit, your gems are round instead of full of faceted detail.

If you like the look, try it! My molds came with the recipe and instructions so it wasn't nearly as difficult as I thought it would be.

Happy Baking!

Photobucket

Sunday, January 24, 2010

Dora The Explorer 5th Birthday Cake!

As the mother of two boys, we don't get into a lot of cutsie stuff around here. It's more about Construction, Monster Trucks, Video Games, Bike Riding, Remote Control Vehicles.... you get the idea. So when I have the opportunity to go all girlie on a cake, I can really get into it.


This is one of those cakes. My client ordered the cake and wanted Pound Cake, Buttercream Filling, and Dora. That's it. No design parameters... and you know I love that! It's so great to be able to search around for inspiration and then come up with a design that is completely unique.

The decor on this cake is mostly fondant with a little buttercream piping. I just love this design. My mind is already racing with different color combination's that could be used to create a completely different look.

Happy Baking!
Photobucket

Saturday, January 23, 2010

TCC is now accepting Valentine's Day Orders for Holiday Crunch!


The irresistible combination of pecans, almonds, and popcorn coated with caramel toffee and drizzled with rich dark chocolate is one that will excite even the hardest to please gift recipient. It's a tender, melt in your mouth treat that never fails to make an impression! Holiday Crunch is the perfect gift for your Valentine! Some other suggestions include Birthday's, Anniversary's, House Warming, Teachers, Thank You's, Client Gifts, Holiday's, and Hostess Gifts.


For more information on Holiday Crunch Pricing, Shipping, and Gift details, please visit Truly Custom Cakery.

Want to let someone know that you would like tor receive Holiday Crunch for Valentine's Day? Send me a message at TrulyCustomCakery@gmail.com with your name, their name and their e-mail address and I'll send them a Wish List Suggestion for you!


Photobucket

Friday, January 22, 2010

Truly Custom Cakery now offers Birthday Parties!!!

Truly Custom Cakery has partnered with Lollipops & Gumdrops, of Huntingdon Valley to offer Couture Cake Creator Birthday Parties.

Emulate your favorite cake designer at your very own Couture Cake Creation event!

This Birthday Party package is for 12 guests (including the birthday celebrant).

Each guest will dress in a "couture" apron as she prepares to decorate her own pre-made and fondant covered personal cake. Guests will be led by cake designer, Stacey Hill, owner of Truly Custom Cakery, as they sketch their ideas on a baking color sheet. They will then creatively assemble their design with prepared cake accessories such as: fondant strips, candy jewels, and other theme related accessories.

Each designer will be crowned "couture chef" with their own chef hat and will receive a personal photo with their creation. A box will be provided for each guest to transport their cake art.

The guest of honor will receive a personalized "couture" apron to keep.

Package also INCLUDES a Birthday Cake designed according to the party theme and color specifications with servings for 15. The cake will be enjoyed at the conclusion of the party.

Possible Themes include but are not limited to:
Ballerina
Princess
Hollywood Diva
Spa

Package price: $475.00
Add $15.00 for each additional guest.
Also included in the package: tablecloths, plates, napkins forks, and a decorative table centerpiece.
You may wish to provide the children with snack food or pizza.

Contact Renee Lawsin of Lollipops & Gumdrops to schedule. 215-947-ROSE (7673)
Photobucket

Wednesday, January 20, 2010

Some of my favorite baking hints. Happy Baking!

Baking has always been a passion and although I don't share all of my recipes, I'm thrilled to share others. There are some hints and tricks that everyone should know when trying to accomplish magic in the kitchen. They aren't secrets, but if you haven't spent a lot of time on recipe websites, in recipe books, or in the kitchen there are times when you feel at a loss that someone else can use the same recipe you use and get such a different result. Sometimes it is just nice to have someone hand you a few hints.

So I'm going to share some of my favorite hints for baking. Try them and you will know why I love to "tweak" a recipe.

First of all, you can fool anyone into thinking you are an amazing cook if you can follow a recipe and you know where to go to find the good ones. I've found the best way to produce a "sure thing" in the kitchen is to use recipes that others have tried and tweaked. Feedback is HUGE when it comes to a recipe. If I'm buying ingredients to make something I want to KNOW that it's going to be good. I don't like to try a recipe that might or might not be enjoyed. Who wants to waste ingredients? Who wants to go through all that trouble and then have to throw away their hard work? I take cooking and baking very seriously and I do not take my reputation in the kitchen lightly.

Let me start by introducing you to two of my favorite resources for recipes on the web.


Why are they my favorites? First of all they both have some great search features. You can search by a variety of methods including ingredients you have on hand, theme, course, and even by preparation method. Each recipe has the opportunity to be reviewed, commented on, and rated. You can sort recipes by those ratings and then read what the other cooks did with that recipe to produce the results they wanted. These tools are huge! I am not a big fan of turning a page in a recipe book and blindly trying something. But if 150 people tell me that they didn't think two ingredients would go together but they tried it and those ingredients not only went together but produced a mouth watering result, I will not only take note, I'm likely to see what all the fuss is about, try that recipe, and learn a few things in the process.

So Here we go...

Hint 1: You don't have to recreate the wheel. Use the tools available to you and use them for all they are worth!

Hint 2: Pudding. Pudding. Pudding...


Let me elaborate on that. Take the Nestle Toll House Recipe for example...

Cut the Flour down to 2 1/8 of a cup and add a package of vanilla pudding. Don't take my word for it. TRY IT! I promise, you'll love the result. Tweak it a little more, to get a chewy cookie, use bread flour instead of all purpose.

To elaborate a little further...

Pudding and Cake... Have you noticed all the cake mixes that claim "the pudding is in the mix". Why? Did you ever wonder about that?

Try this the next time you bake a boxed cake mix. Ignore the instructions on the back of the box and do this instead:


Moist and Delicious Boxed Cake Mix

1 Box Mix (any flavor)

1 Package Pudding Mix (Vanilla for most flavors and Chocolate for Chocolate cake mixes)

1 Cup Sour Cream

1/2 Cup Oil

1/2 Cup Warm Water

4 Eggs

Follow the mixing and baking ingredients on your box only substitute these as your ingredients. You won't be diappointed. Oh... ADD CHOCOLATE CHIPS to your Chocolate Cake Mixes. I think Mini work best.
Photobucket

Tuesday, January 19, 2010

Lower Fat Double Chocolate Chip Cookie Recipe


side note: I spent about 6 months tweaking the ingredients to get this cookie just right. If you make substitutions or change measurements, I can't be held responsible. Make changes at your own risk!!!)

Preheat Oven to 350 degrees

3/4 cp Land O Lakes Light Butter (Softened)
1/4 cp Applesauce
1 small pkg Chocolate Pudding
1/4 cp White Sugar
1/2 cp Splenda
3/4 cp Brown Sugar
2 tsp Vanilla

Combine the above ingredients and mix.

2 Eggs(room temperature) (or egg beater equivalent)

Add Eggs and mix

1 cp. White Flour
1 cp. White Wheat Flour (King Arthur Brand)
2/3 cp. Cocoa Powder
3/4 tsp Baking Soda
1/4 tsp Salt

Combine these ingredients in a separate bowl and whisk together lightly to incorporate. Then gradually add the dry ingredients to the wet ingredients just until they are thoroughly combined. Do Not Over Mix.

1 1/4 cps Mini Chocolate Morsels (Yes, it makes a difference!!!)

Add Morsels and stir

Spoon onto a greased cookie sheet and bake for 10 minutes. Do not over bake. Pull them from the oven before they look "done". When cooled they will firm up and you'll have a chewy and chocolaty treat. You can add nuts if you like and you can also add dried cherries.

Photobucket

Friday, January 15, 2010

Nursery Friends Baby Shower Cake

How do I pick a favorite cake when each weekend I get to do a cake with its own unique theme that has so many great elements. I just love how cute this cake turned out. My client provided fabric swatches, plates, invitations, napkins, and anything else they had from the shower theme so I could match it. My instructions were to add the gingham check and make sure there was a cute giraffe sitting on a blanket.

So... this weekend... another new favorite. I just love my job!


Photobucket

Sunday, January 10, 2010

Harley Davidson Surprise 60th Birthday Cake

This client was surprising her husband with a 60th Birthday Party. He has a Harley Davidson Touring Bike. It's BIG and he loves it! She wanted to reflect his love for riding in his cake so she provided photos of the Birthday Boy and his motorcycle so I could replicate them. I happened to run into her at the Country Club when I delivered the Cake and was thrilled with her reaction. I love a happy customer!

So here it is. Orange and Black Harley Colors with a modified Harley Logo to reflect the occasion. The cake topper is sculpted entirely out of gum paste and then I gave the bike a custom paint job to match the real thing.


Three tiers of cake consisting of White Almond Sour Cream Cake with Raspberry Filling and Double Chocolate with Raspberry Filling.

Photobucket

Tennis Court Birthday Cake - For the not so athletically inclined

When I got the call for this order I started laughing right away. The Birthday boy is turning 50 and his wife wanted a cake to reflect his love for Tennis. Unfortunately he and his tennis buddies aren't the "BEST" tennis players so this cake was to reflect her observations.

The requests for the players included:

1. Birthday Boy on his face with a ball in his ear.
2. Man 2 with a pink tennis skirt.
3. Man 3 by the net falling, getting hit with a ball, tennis racket on it's way down.
4. Man 4 with tennis elbow. Would rather be golfing, so give him a golf club instead of a racket.


All requests filled. Too funny. Lots going on and took about an hour each to sculpt the men. The most difficult were the men that are upright. The men laying down were so much easier.

White Almond Sour Cream Cake with buttercream and fondant. All fondant and gum paste accents. Net is made from Gum Paste and allowed to dry overnight.

Photobucket

Monday, January 4, 2010

More Reader Photo's of Melted Snowman Cookies

I just love that you guys keep sending in photos of your melted snowman cookies. It is such fun seeing all the variations and reading your stories. So here are some more. Keep them coming...

And remember, snowmen can survive through March! Add a little twist and put a candy heart in their hand or a cinnamon heart on the chest for Valentine's Day. In fact... I'd love to see some Valentines Day Variations! Are you up for the Challenge???

(Beware of Yellow Snow)


Photobucket

Saturday, January 2, 2010

Winter Wedding Cake. Congratulations Amber & Ryan!


It's such fun to work on a cake around the Holiday's. From Snowflakes, to Christmas Colors, to Lights, the presentation is just beautiful. This cake was made for the daughter of some good friends. It was such a blessing to make this cake for Amber & Ryan.

There are a total of 8 cakes. Flavors are pound, chocolate, vanilla, and strawberry. The pound cake has a homemade raspberry filling. The rest of the cakes are strictly buttercream.

Amber was a really easy bride. I asked questions to get a feel for the style they wanted and once we worked that out, I would ask about different techniques and design options and got a lot of "whatever you think will look best". It made decorating this cake great fun because it is full of variety but not overdone.

Enjoy the photos! And Happy New Year!


Photobucket