Showing posts with label tutorial. Show all posts

Tuesday, December 14, 2010

Candle Cake Tutorial


How would you like to be able to make this cake as a centerpiece for your holiday table? There are no special tools involved, no fondant, and no previous cake decorating experience necessary.

The tutorial should be up on the website tomorrow! Happy Baking!

Photobucket

Friday, January 29, 2010

Make Your Own Edible Sugar Gems - Tutorial and Resources

All of my supplies were purchased at Country Kitchen SweetArt


These are the instructions I used from the book Cooked Sugar Art by Vi Whittington.
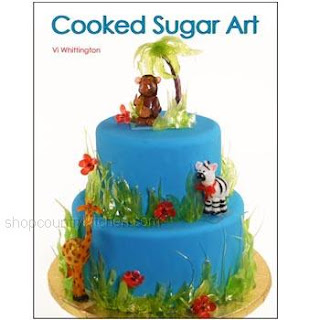

If you do not order the book, you will still receive instructions when you order the molds.

Isomalt recipe from Cooked Sugar Art

2 cups isomalt
1/2 cup distilled water, or water from the tap; distilled water has
fewer impurities
Distilled water or water from the tap for brushing down crystals
Food coloring, optional
1/2 teaspoon flavor, concentrated or oil, optional
Tools:
Candy thermometer
Heavy saucepan with lid
Whisk
2” brush
Small strainer
Large pan with ice water (base of saucepan should fit inside)
Microwave-safe bowls (A silicone muffin pan with the cups cut apart works well for containers as well as silicone cupcake holders.)
Locking bags for storing, or a sealing machine, if not all sugar is used
Instructions:
Best to work in a cool room with low humidity. In a heavy saucepan, whisk water into isomalt. Heat on medium low and stop stirring for the rest of the process. When mixture becomes clear, skim off foam with strainer. Dip a clean brush into water and gently brush the inside perimeter of the saucepan with wet brush, slightly above the boiling sugar. Continue skimming the foam and washing down the sides of the saucepan until the syrup is completely clear. The impurities are not harmful for consumption, but by removing the foam, the resulting syrup will have more clarity and strength. When crystals are washed from the side and syrup appears clear, place thermometer in pan, and cook to 250 degrees. Add food coloring if desired. Continue cooking on medium heat to 340 degrees. Immediately remove pan from stove and plunge into cold water for a few seconds to stop the cooking. Gently stir in flavor. Cover for two minutes to be sure the flavor is infused into the syrup. The resulting syrup is ready to pour into molds, or poured into puddles on parchment paper or a silicone mat to cool. Store the puddles in locking bags, storing flat without pieces in each bag touching each other. Better yet, vacuum seal the pieces in bags. Place bags in airtight containers with silica gel. If wanting to cast (mold) the hardened pieces of isomalt, place isomalt in a microwave-safe container and microwave at 5 second intervals until a liquid state. The resulting syrup is ready to mold into jewels (follow instructions above for casting jewels).


Basic Casting Instructions for Isomalt or Venuance Pearls
Ingredients:
Syrup recipe (see below)
Cooking spray
Tools:
Jewel molds
Funnel with stopper for large jewel cavities
Large silicone spatula
Baking sheets
Large measuring cup-for large jewel cavities
Toothpicks or sucker sticks
Silicone mat or parchment paper
Silicone cupcake holder
Instructions:
With cooking spray, coat hard candy jewel molds and a funnel with a stopper if using a mold with large jewel cavities. Wipe out excess cooking spray with a paper towel. Set sprayed molds on a baking sheet or a surface that withstands heat. For small cavities, use a toothpick or sucker stick to fill. If using a funnel, set the funnel with the stopper covering the hole, in a large measuring cup or any container which will hold the funnel level. Pour the hot syrup into the funnel. Fill each cavity by lifting the stopper just enough to allow the syrup to fill each mold cavity, then quickly cover the opening in the funnel with the stopper to stop the sugar flow. When jewels cool, invert each mold, letting jewels fall from mold onto parchment paper or a silicone mat which is on a soft surface such as a folded towel.
_____

What I did is make the Isomalt and then pour it into little puddles on my silicone mat. I left it clear. Then I would take a small ramekin or mug and microwave a few at a time to melt them. Then I'd flavor and color that mini batch. You need to do this near a microwave because I found I was warming my batch in 15 second intervals every 5-10 minutes while casting the jewels. A coffee cup warmer would probably help a lot!

Then you can pour about 3 tsp at a time into a little medicine cup or silicone muffin cup (suggestion above) and fill the cavities in your mold. If you bang the medicine cup on the table a few times before you pour, you'll eliminate a lot of bubbles. It's definitely trial and error. The biggest things I learned are to work in small batches, keep it hot, and WATCH OUT FOR BURNS! I've got blisters on both hands!

Isomalt shouldn't cloud but if it does or you want more shine, spray it with cooking spray and they'll perk right up.

Country Kitchen also sells silica gel packs. Get some when you order your supplies and put them in with your stored gems in an airtight container. That will help maintain low moisture to prevent sticking.

Photobucket

Wednesday, December 9, 2009

Melted Snowman Cookie Tutorial. Part 2 - The Cookie

This tutorial has been moved to our website. HERE

After your dough has chilled for at least 4 hours, prepare your work surface. You'll need flour, a couple of cookie sheets lined with parchment paper, a spoon or cookie scoop, and a pre-heated oven.


See more... HERE.

Photobucket

Marshmallow Melted Snowman Cookie Tutorial.


Okay… so if we are going to learn how to make a melted snowman cookie, you need cookie dough. You can use just about any Sugar Cookie Cut Out Recipe you choose. But I use one from AllRecipes.com that tastes really good, is soft, and is substantial.
My thought is that if I’m going to go through all the trouble to hand form cookies and decorate in steps,
I want a “COOKIE”. Not some little tiny thing that is gone in one bite.
So… Here’s the link to Michelle’s Soft Sugar Cookies. http://allrecipes.com/Recipe/Michelles-Soft-Sugar-Cookies/Detail.aspx Make a batch and get it chilling in the fridge. The recipe says overnight BUT if you get the dough made in the morning, you can be doing a project with your kids after dinner that night. You need the dough to chill thoroughly so think at least 4 hours in the fridge.
While your dough is chilling in the fridge, start to assemble the ingredients for the next step.
You’ll need:
  • Large Marshmallows
  • Royal Icing (Choose a Recipe from All Recipes )
  • Icing Colors (Food Color or Wilton Gel Colors of your choice. You can find the Wilton Colors at a Craft Store)
  • Silver Dragees, Mini Chocolate Chips, or other little candy pieces you could use for buttons and accessories on your snowman. (You can pipe these details in royal icing OR use accessories. For kids… accessories are easier)
  • Parchment Paper
  • Shortening
The original concept for a cookie that looks like a snowman melting (Mr. Melty is Meaghan’s name for him) came from Meaghan Mountford of The Decorated Cookie. Her technique is different but if you don’t want to bother with a melted marshmallow and you are familiar with fondant, you might want to try her technique.

MELTED SNOWMAN COOKIE TUTORIAL. PART 2 – THE COOKIE

After your dough has chilled for at least 4 hours, prepare your work surface. You’ll need flour, a couple of cookie sheets lined with parchment paper, a spoon or cookie scoop, and a pre-heated oven.
 

Using a cookie scoop or a tablespoon, scoop a small ice cream scooped size of dough and sprinkle it with flour. This is important if you don’t want the dough sticking to your hands.
 

Roll the dough into a ball and start to press it flat. Make it so it has a real wavy kind of funky look to it. The ultimate goal is a puddle. There is no right shape. I like to start it in my hand and then set it on the cookie sheet and press it down until it’s about half an inch thick.
 
Make them all different.

Go ahead and repeat that step with each cookie. You’ll want to get them as close to the same size as possible but they don’t have to be exact.
 

Bake according to your recipe directions. While they are baking, go ahead and make your Royal Icing Recipe. I use the Wilton Recipe that has Meringue Powder. If you would like to use this recipe, you can purchase Meringue Powder at a craft store.
Here is the recipe I use:

WILTON ROYAL ICING RECIPE.

INGREDIENTS:

  • 3 tb Wilton meringue powder
  • 1 lb Sifted powdered sugar
  • 6 tb Water

PREPARATION

IF using a counter top mixer, beat all ingredients at low speed for 7 to 10 minutes until icing forms peaks. If you are using a hand held mixer, it will take more like 10-12 minutes.
AFTER you get stiff peaks, you’ll want to transfer about 1/2 into a bowl and add a 1/2 a teaspoon of water at a time while stirring until the consistency is slightly runny.
To test for the right consistency: Using a knife, scoop a little of your runny icing and hold above the bowl. As it drips, count to 10. By the count of 10, the icing that dripped down should meld into the icing in the bowl so there is no indication of where your drips landed.
Put your icing in a container covered with a wet paper towel and a lid.

MELTED SNOWMAN COOKIE TUTORIAL. PART 3 – THE ICING AND MARSHMALLOW

Now that your icing is made and your cookies have cooled, you are ready for the next step. Place a piece of parchment paper on your work surface and pick a couple of cookies to start with.
 

Spoon a small puddle of icing onto your cookie and using the back of a spoon or a knife spread it around making sure to go right to the edges in some spots so he looks drippy.
 

Next, liberally grease a plate or silicone mat with shortening. And place about 8 marshmallows on the mat, spaced out. Set your microwave for 20 seconds and DO NOT WALK AWAY. Watch the marshmallows. As they start to puff up, you are ready to go. Don’t let them get huge or melt. You just want them to puff. Stop your microwave BEFORE they double in size.
 

Liberally Grease your fingers and pick up one marshmallow at a time and kind of smoosh it into place. You don’t have to be neat or perfect, just get it on there. The marshmallow should not stick to your fingers as long as you have shortening on them.
 

Repeat this step for each cookie and then let the icing set up just a bit.

MELTED SNOWMAN COOKIE TUTORIAL. PART 4 – DECORATING

At this point you’ve got your base ready to go and you can decorate as you please. You’ll need some piping bags and size 1 or 2 tips. You can also use a zip top bag with a very small hole cut in the corner. Color your royal icing the colors of your choice and have fun. If you have never done royal icing cookie decorating, you might want to take a look at this tutorial by SugarBelle before you begin. Cookie Decorating Tutorial.
Every decoration on these is royal icing. I pipe the noses on in a medium/stiff consistency. Use a #1 or #2 tip and pull up and away as you pipe. The nose should stand up in the direction you pull.


Melted Snowman Cookie Tutorial. Part 3 - The Icing and Marshmallow

This tutorial has been moved to our website HERE.


Photobucket

Melted Snowman Cookie Tutorial. Part 4 - Decorating

At this point you've got your base ready to go and you can decorate as you please. You'll need some piping bags and size 1 or 2 tips. You can also use a zip top bag with a very small hole cut in the corner. Color your royal icing the colors of your choice and have fun.

Here are a few different ways we decorated.


Yep, that's a snowball in her hand. I got my hands on a bag of Kraft Micromallows and just love them! They are the size of mini marshmallows in hot chocolate mix. Perfect for mini snowballs. To make it easier on the kids, you can use Silver Dragees or mini chocolate chips for buttons.

Photobucket

Tuesday, December 1, 2009

Monday, February 23, 2009

One Crazy Week


My good friend Nicole was drafted to make a surprise 30th Birthday cake for a good friend. I offered to help her and we worked side by side. She worked on her 30th Birthday cake while I worked on the Monster truck. It was a LOT of fun to have someone to share in the creative process. We did a lot of laughing, a little commiserating, and made a HUGE mess 3 nights in a row. It was a blast. I hope we can work on another project together in the future.

Other than helping her learn how to make fondant and cover a cake, the only other thing I did is help make the topper. She did the rest by herself! Not bad for her first attempt at fondant. She did a great job!!!